The Mudroom...No Mud In Here!
- Apr 25
- 8 min read

The Mudroom. Who doesn’t want a mudroom? Do you have one too? Technically it’s just a fancy laundry area with storage for all your junk right? (I will not be opening the cabinet doors today). I don’t really remember when these became popular, but all I know is that I wanted one! When I first moved into this house almost 18 years ago, there was no indoor laundry. And by this, I mean that I had to go to the garage, which isn’t even attached to the house, to do my laundry. Therefore, because I’m a big fraidy cat, I was very limited of the times that I could do laundry! If I forgot something in the washing machine or the dryer and it was dark out, I wasn’t going out there till the next day! So, actually one of the very first things that I did when I moved into this house was to add indoor laundry! I paid someone to turn the closet by the back door into a laundry space. I am lucky enough to have started with a lot of unusual and special extra spaces! Like a back hallway that had a closet! In a 1940's house!! At some point along the journey, I thought about making this into a teeny tiny second bathroom, but that's a story for another day! Anyways, back to the original story....so, I bought a special order, compact, stackable Bosch washer and dryer, because it was only about a 24" x 24" space, and choices were limited. This literally changed my life and made me so happy!! And the Bosch was amazing! Plus I used to come in and out of this door all the time, so it was the first thing I saw every time that I came home and I loved seeing it! It was worth every single penny that I spent to make it happen!! BUT NOW, I have a brand new beautiful black stainless steel, extremely large capacity washer and dryer in a gorgeous mudroom and I love it! And I LOVE the black stainless steel, as black is basically my favorite color! More on that next...

So, when the addition came along, I wanted a proper size washer and dryer that I could throw all of my laundry in for the week and wash all in one load, instead of three or four loads! So I looked through magazine after magazine and cut out stuff. I saved pictures in my mudroom file on my phone - I have tons! Originally I wanted to put a nice counter in there with a shelf or a cabinet above it, maybe with some kind of a fancy industrial looking wrought iron and wood shelf type thing, with a bar for hangers as a place to hang clothes to dry. And then I thought about paying someone to install all of that. Could I do it myself? And so I started looking at furniture. Now remember, I am on a major budget! Of course I found many things, but in the end, I found a beautiful piece of furniture at Kirkland‘s. I knew this was meant to be.
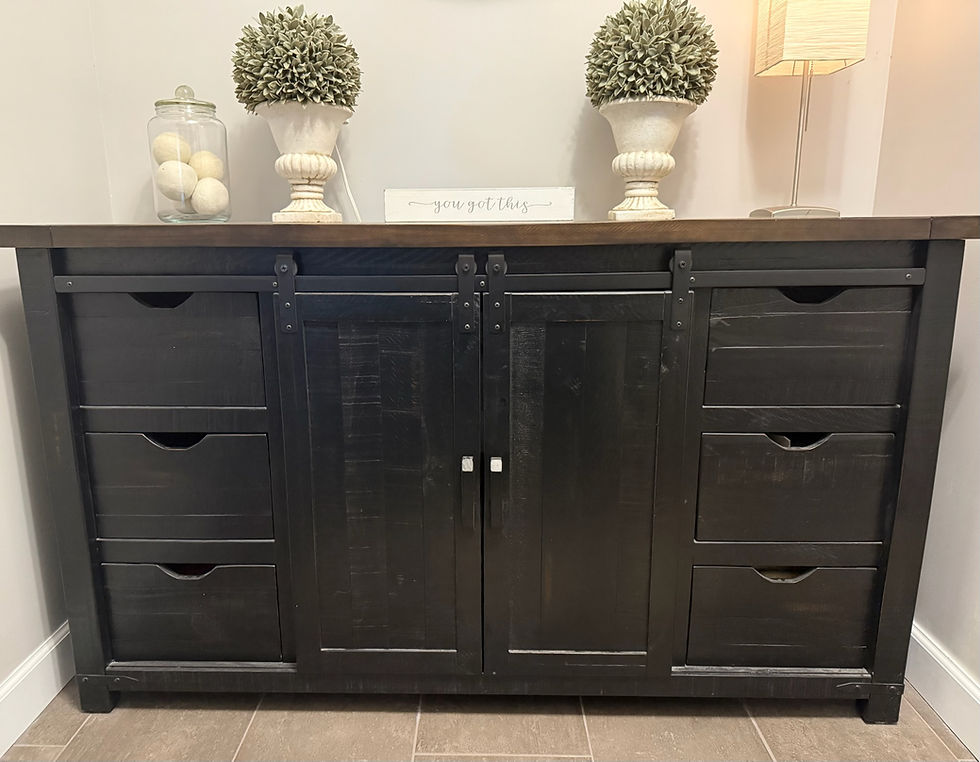
So I stalked it and I waited for it to go on sale...and eventually I got about $200 off the price, and I got it for around $400! Go me!! And in the end, it actually was a much better choice than just boring old, granted nice, kitchen style cabinetry. I realized how good this was gonna look after I thought about the fact that you will be able to see this piece of furniture from my dining room and my kitchen, and my living room, and what a smarter choice this was. This was much cheaper and no installation! I actually didn’t even have to put it together! It came all put together in a giant box! Now I knew I also needed some kind of storage for the other side of this space and I knew it needed to be narrow. So my first thought was IKEA, but I also went searching at thrift stores and places like Renninger's in Mount Dora for something unique. Originally, this was supposed to be my Dyson closet, as I have always lacked a space for my vacuum cleaner and I just wanted it to have a proper home, and this area made sense because it was kind of centrally located to some extent. I almost bought this old antique gun cabinet at the antique/thrift store to use there, but in the end, IKEA won this one and it was much easier. I could go grab it myself and put it together while I watched t.v.! It was perfect.

The biggest downfall of this is that I could not store my Dyson in here because the fixed shelf was in the middle of the cabinet and prevented me from storing the Dyson in there all put together, because it was too long…but that was my compromise. I store batteries and extra lotions and vinegar and there’s a little garbage can in there for the lint from the dryer. I also store excess screws and random little things that you need for around the house that used to clutter up my pantry. This had solid doors on the bottom half, but the top half was glass, so I used some of that frosted cling film stuff to block out the clear glass, so that you can’t see all my junk inside!
So, I also wanted some kind of little stool in here with some hooks like a typical mudroom has. I wasn’t sure what color scheme I was going for but somehow I ended up with this brown faux leather and metal stool. I got this from target and I think it was a steel for around 50 bucks! It looks like it cost a lot more!

I ended up doing the brown because my best friend had given me this old leather bag that she needed me to store and I really didn’t have anywhere to put it so I threw it up on top of the dryer, which is black stainless steel. Then, I realized how good the black and the brown looked together. Now I have always been a fan of black and brown together, but I just hadn’t thought about for in here. So when I had that bag up on top and saw that brown color with the black and then I found the brown stool…I knew it would be perfect!

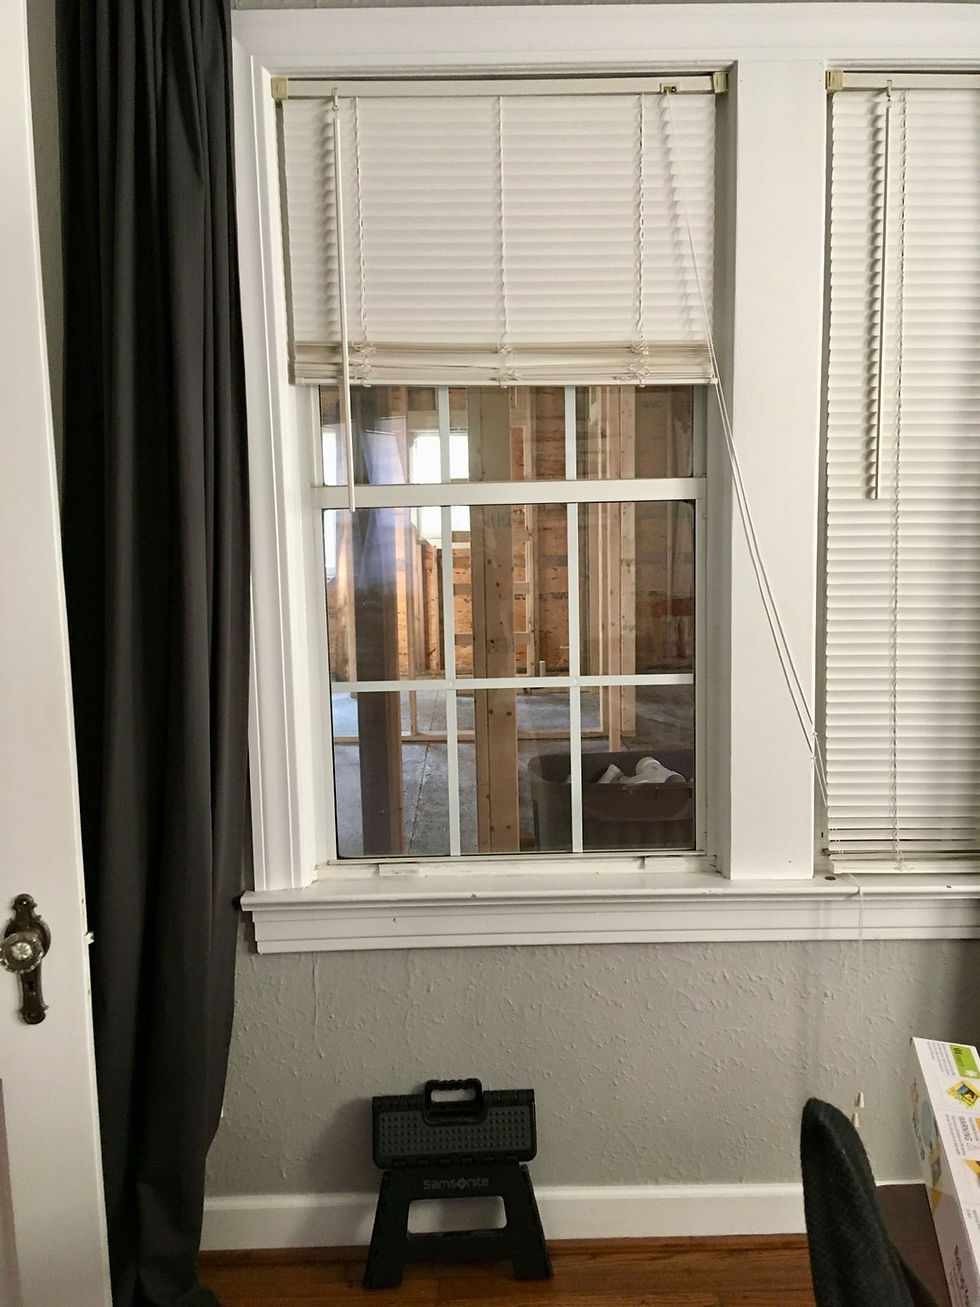
So let’s get down to the nitty-gritty of the mudroom and the specs of it all. Originally there were two sets of two (so four) windows in the dining room. One set of windows would become the opening to the addition. They would eventually take out the windows and make this space a doorway. On the other side of this wall was the original 1940's brick wall on the outside of the house...the addition would go out from here. Anyways, this opening started out as the width of two windows, so it was about 5 feet wide. Well, I obviously didn’t want a 5 foot wide entrance into my laundry area, so I had them build half of the wall back where the extra space was open from the other window. Now this would cause an issue on the other side (the original outside brick exterior) as some of the brick would be missing on this wall, because a window once lived here. I thought about using that fake brick again, but I ended up just having them wall this off, because I was going to cover it up with a storage cabinet! Phew. Thank goodness that didn't turn into a disaster!


So like I said, the one wall on the cabinet side of the mudroom, was the old exterior brick from the outside of the house, so I got to paint some more brick and that was really cool! I love the painted brick look. This is where I realized how thick the walls in my 1940s house actually are. The entrance from the dining room into the mudroom, the wall is about a foot thick! Check it out.

Now, I also knew that I wanted there to be as much light as possible in here, so I wanted to get a door with a window at the top, just to let a little bit of light in. This turned out to be fantastic for a reason I would have never guessed at the time. We now also have a hummingbird feeder out there and you can see it through that little window. I have seen the hummingbird all puffed up, when it was 22 degrees outside, sitting at the feeder. I have seen the hummingbird chase a bee off of his feeder. It's so neat! It's like a little spy window to see the hummingbirds! And it also does its' job of letting natural light in!

THE RUG! Yes, dammit, I was in love with another rug. Sadly, this one had to go after the first few months...but, I still have it rolled up stashed in the house, hoping one day I can find a new home for it, because I love it that much! This rug shed. It shed bad. And since it's in the laundry room and you may drop wet laundry or dry laundry when doing the laundry, then little bits of hairy looking stuff would come off the rug and stick to your clothes. Yuck! So, I bought a washable runner at Aldi one day on a whim and have been looking for a budget friendly jute/sisal looking rug, that does not shed yucky stuff on our laundry, ever since! So, that is why you may have noticed different rugs in different pictures. Looking at these pictures made me realize, I need to find a new rug soon!
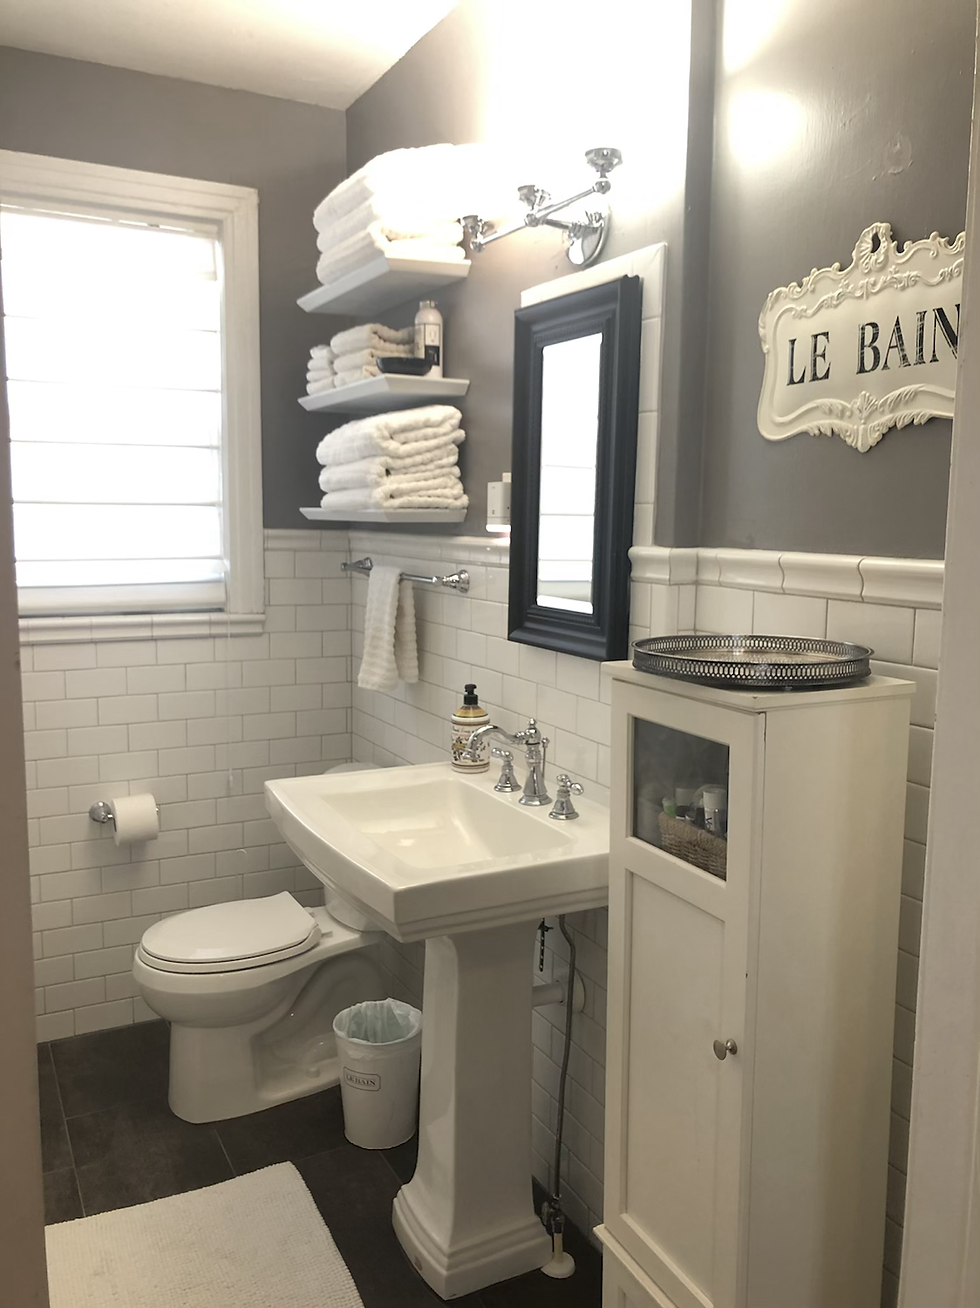
Now let's get down to the design detail basics...paint, light fixtures and tile. We used the same color scheme here as the rest of the addition to keep it simple. Valspar Filtered Shade, which is basically gray! I also used the same dark gray tile that we bought for the bathrooms and I love it! Dark gray tile was in most of the pictures that I saved of other people’s mudrooms, so it worked out perfect for my vision! The light fixture came from Lowe’s and I’d had my eye on it for a while. It’s perfect because I love it, but also because it has three light bulbs in there to help keep the space bright when needed. Although I normally hate bright light, some places need light! I think it all came together pretty darn good if I say so myself! I love this space and it makes doing laundry much better!
Personal Note: When my best friend bought her 1940's house it had a separate garage and back/side door entry at the top of the driveway too. I always thought this was the coolest thing and loved it when I found a house with the same set up! In the beginning of this post, I mentioned coming in the back door before the addition was built. I knew when we were planning this all out that I wanted to make a new side door that would replace the back door as a main point of entry. I loved being able to park at the top of the driveway and come in the back way, which is now the side way! When we built the addition, I didn't want to lose this feature, as it was, albeit silly, one of my favorite things about the house. And therefore, the Mudroom was born!


Be Kind
Speak Truth
Love Others
Show Grace
Work Hard
Stay Humble
Have Courage
Be Grateful
Subscribe and be notified of my next post!
Follow along for more & tell your friends!
Lisa xoxo


Comments